


Preamble
This is my third week hanging out in the Web3 world. I did two mini DApp projects with buildspace. I highly recommend them to jump headfirst in Web3 and get a feel of a typical DApp, from its chassis to the engine.
Next, I wanted to get intimate with this thing called "Blockchain." Yeah, I had earlier created a "Hello World" DApp with a "smart contract" and a front-end, but I wasn’t sure how exactly blockchain does its thing.
So, I went on a quest to write my own blockchain. I decided to write it Golang, which is my native language, and also because the Ethereum world gets along well with Go (Go Ethereum is an official Go implementation of the Ethereum protocol.) Go is a language that doesn’t have too much proprietary syntax, so even if Go is not your thing, you will still be able to follow the logic and the premise of the code blocks below.
With that out of the way, let’s get the party started.
This party is divided into two parts: In the first part (this), we will build a simple, basic blockchain that will let us initialize a blockchain and add new blocks to it. In the second part (to come), we will secure it by adding an algorithm to handle the "Proof of Work" construct.
Part I: Building a basic blockchain in Go
Project setup
What we are writing is some code, which, when run, will:
- initialize a new blockchain,
- add two blocks to it, and
- print the list of blocks.
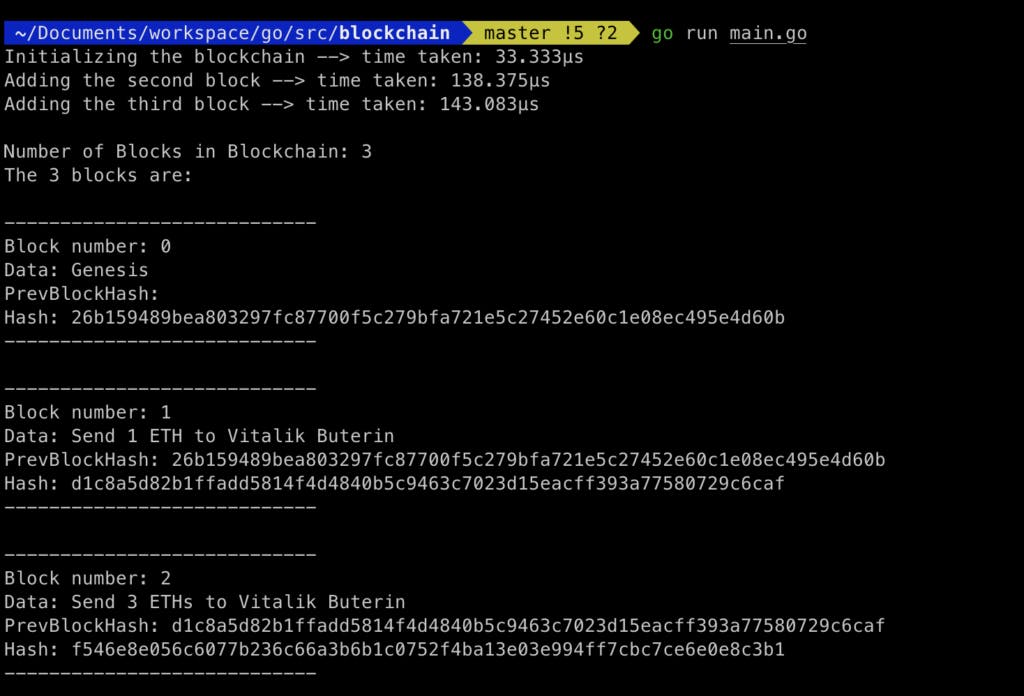
This is what the output should look like:

I have placed the binaries of the program here. Download one for your operating system and run it on the terminal to see what we are building. (You may need to make the file executable by issuing chmod +x). The code is also there—if you are feeling adventurous, clone/download the code and type go run main.go on the terminal.
Now that you know what's being built, let’s actually build it.
This is what my project setup looks like:
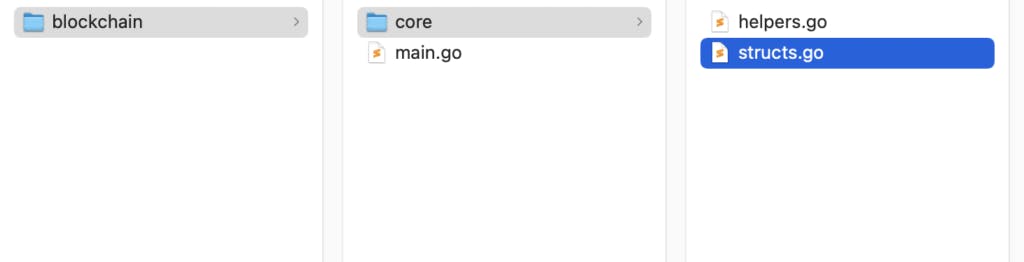
There are only three files—main.go in the root folder and structs.go and helpers.go in "core" folder. The main file that we will run is main.go, which will talk to structs.go and helpers.go to get the job done.
Coding a blockchain
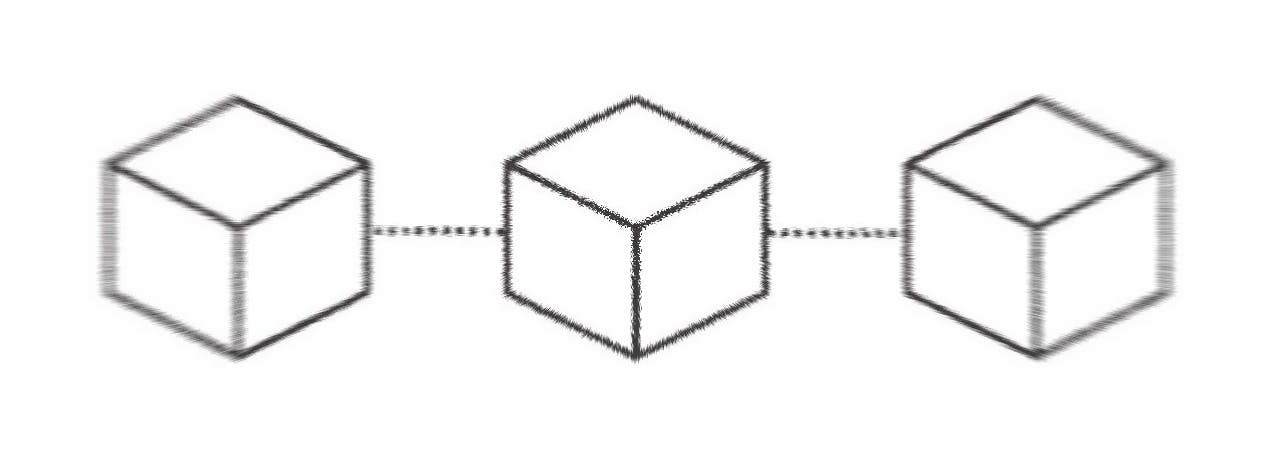
First thing first, what is a blockchain? If you asked your grandma, she would've guessed something like, "a chain of blocks?" And she would be right—a blockchain is just that, a chain of blocks. Of course, no one is going to get paid big bucks because they know blockchain = chain of blocks. It's a lot more complicated than that, and that's why you are here.
Anyway, here is a video demo that does an excellent job at explaining how this chain of blocks works.
In programming lingo, a blockchain is essentially a distributed, immutable, ordered, and back-linked list of blocks.
- Distributed: A blockchain runs on thousands of nodes (i.e. computers) around the world.
- Immutable: You cannot change a blockchain. You can add new blocks to it, but you can’t go back in time and “edit” an existing block.
- Ordered: A blockchain is an ordered list of transactions. Given two transactions TxnA and TxnB, where TxnB depends upon an output of TxnA, TxnA must precede TxnB in the list.
- Back-linked list: Every block in the chain carries a reference to the previous block. It is a form of a linked list in which each entity has a reference to the next entity.
Now, “back-linked list” perhaps suggests that we need to create a programmatic representation of a block and a blockchain (which simply contains an array of blocks.) This block, at a minimum, should have four fields: Timestamp, Data, PrevBlockHash, and Hash.
- Timestamp: To record when the transition occurred.
- Data: The field that holds the primary data of the block.
- Hash: To keep the blockchain secure, we need to “hash” this data. The “Hash” field contains this hash. There are several hashing algorithms; Bitcoin uses HashCash algorithm which was initially developed to fight email spam, whereas Ethereum uses KECCAK-256.
- PrevBlockHash: This is a reference to the hash of the previous block.
File #1: structs.go
Here are the structs for Block and Blockchain in structs.go.
// structs.go
package core

// define a block.
// #DogeToTheMoon
type Block struct {
  Timestamp     int64
  Data          []byte
  PrevBlockHash []byte
  Hash          []byte
}

// chain is a just slice of blocks
type BlockChain struct {
  Blocks []*Block
}
That's it for the structs.go file.
File #2: helpers.go
Now we move on to helpers.go file that contains the logic to initialize a blockchain and add blocks to it. The helpers.go file will contain two public functions which will be called by main.go: InitBlockChain() and AddBlock(data string).
Open helpers.go and add a skeleton for the two functions: func InitBlockChain() *BlockChain {} and func (chain *BlockChain) AddBlock(data string) {}.
InitBlockChain() function
The first block in a blockchain is generally called a genesis block. Since this is the first block, PrevBlockHash is set to nil because, well, there’s nothing before it.
This is what our InitBlockChain() looks like. The code should explain itself.
// helpers.go
// to initialize the chain with a genesis block
func InitBlockChain() *BlockChain {
  var blockChain = &BlockChain{} *// create a new blockchain*
  blockChain.AddBlock("Genesis") *// add the genesis block to the chain*
  return blockChain
}
AddBlock() function
AddBlock() is responsible for creating a new block and appending it to the chain.
// helpers.go
// To add a block, get the last block in the chain, create a new block, and append it to the chain
func (chain *BlockChain) AddBlock(data string) {
    // create a new block
    var block = &Block{}

  // set the block data
    block.Timestamp = time.Now().Unix()
    block.Data = []byte(data)

    // if it's the first block, set the previous block hash to nil
    if len(chain.Blocks) == 0 {
        block.PrevBlockHash = nil
    } else {
        var prevBlock = chain.Blocks[len(chain.Blocks)-1]
        var prevBlockHash = prevBlock.Hash
        block.PrevBlockHash = prevBlockHash
    }

    // First, create block's header by merging the bytes array of Timestamp, Data, and PrevBlockHash
    var blockHeader = bytes.Join([][]byte{[]byte(strconv.FormatInt(block.Timestamp, 10)), block.Data,     block.PrevBlockHash}, []byte{})

    // Use the SHA-256 hash function to generate the hash of the block's header
    var blockHash = sha256.Sum256(blockHeader)
    block.Hash = blockHash[:]

    chain.Blocks = append(chain.Blocks, block)
}
Let’s go over the code: We create a new block with var block = &Block{} and populate its four fields: Timestamp, Data, PrevBlockHash, and Hash.
– Timestamp and Data are straightforward. Set them to time.Now().Unix() and []byte(data), respectively.
– PrevBlockHash: If it’s the first block, set it to nil otherwise, get hold of the previous blocks and set PrevBlockHash to the previous block’s hash.
– Hash: This is the most, and only, complicated part of building a blockchain. This will get more complicated in the second part of the series in which we will make it more secure and make the miners do some real hard work. For this basic blockchain example, all we do is create a SHA256 hash out of the other three fields: Timestamp, Data, and PrevBlockHash. First, create the block’s “header” by merging the bytes array of the three fields.
var blockHeader = bytes.Join([][]byte{[]byte(strconv.FormatInt(block.Timestamp, 10)), block.Data, block.PrevBlockHash}, []byte{})
Then we use the header to create the block’s hash.
var blockHash = sha256.Sum256(blockHeader)
block.Hash = blockHash[:]
Our code to create blocks and add them to the blockchain is now ready. Here is the full helpers.go:
// helpers.go
package core

import (
    "bytes"
    "crypto/sha256"
    "strconv"
    "time"
)

// to initialize the chain with a genesis block
func InitBlockChain() *BlockChain {
    var blockChain = &BlockChain{} // create a new blockchain
    blockChain.AddBlock("Genesis") // add the genesis block to the chain

    return blockChain
}

// To add a block, get the last block in the chain, create a new block, and append it to the chain
func (chain *BlockChain) AddBlock(data string) {
    // create a new block
    var block = &Block{}

    // set the block data
    block.Timestamp = time.Now().Unix()
    block.Data = []byte(data)

    // if it's the first block, set the previous block hash to nil
    if len(chain.Blocks) == 0 {
        block.PrevBlockHash = nil
    } else {
        var prevBlock = chain.Blocks[len(chain.Blocks)-1]
        var prevBlockHash = prevBlock.Hash

        block.PrevBlockHash = prevBlockHash
    }

    // First, create block's header by merging the bytes array of Timestamp, Data, and PrevBlockHash
    var blockHeader = bytes.Join([][]byte{[]byte(strconv.FormatInt(block.Timestamp, 10)), block.Data, block.PrevBlockHash}, []byte{})

    // Use the SHA-256 hash function to generate the hash of the block's header
    var blockHash = sha256.Sum256(blockHeader)
    block.Hash = blockHash[:]

    chain.Blocks = append(chain.Blocks, block)
}
File #3: main.go
We are done with the core of this application. Now we will call these functions we just wrote in our main.go file.
In main.go, we initialize the blockchain, add 2 blocks to it, and then loop through the blockchain to print out the three blocks we just added.
Here is the complete main.go file:
// main.go
package main

import (
    "blockchain/core"
    "fmt"
    "time"
)

func main() {
    var timeStart = time.Now()

    // initialize the chain with the genesis block
    fmt.Print("Initializing the blockchain")
    var blockChain = core.InitBlockChain()
    fmt.Println(" --> time taken:", time.Since(timeStart))

    // add blocks to the chain
    fmt.Print("Adding the second block")
    blockChain.AddBlock("Send 1 ETH to Vitalik Buterin")
    fmt.Println(" --> time taken:", time.Since(timeStart))

    fmt.Print("Adding the third block")
    blockChain.AddBlock("Send 3 ETHs to Vitalik Buterin")
    fmt.Println(" --> time taken:", time.Since(timeStart))

    // print the number of blocks in the chain
    fmt.Println()
    fmt.Println("Number of Blocks in Blockchain:", len(blockChain.Blocks))
    fmt.Println("The", len(blockChain.Blocks), "blocks are:")
    fmt.Println()

    // print the blocks
    for i, block := range blockChain.Blocks {
        fmt.Println("----------------------------")
        fmt.Println("Block number:", i)
        fmt.Println("Data:", string(block.Data))
        fmt.Printf("PrevBlockHash: %x\n", block.PrevBlockHash)
        fmt.Printf("Hash: %x\n", block.Hash)
        fmt.Println("----------------------------")
        fmt.Println()
    }
}
Results
Alright, it's now time to savor the cake we just baked.
Go ahead and run main.go (go run main.go). It will print on the terminal something like this:
If the code hasn't worked out for you, drop a comment below and we will see what we can do about it.
Summary
That is it.
You have already built a basic blockchain. If you understood what we just did, you will enjoy Web3. It gets a lot more fun as you get closer to it.
In the second part of this article, we will go into the concept of Proof of Work, which gives blockchain its most important attribute—security. In brief, Proof of Work makes adding new blocks difficult so as to discourage rogue actors from contaminating our beautiful and sexy blockchain.
See you later. In the meantime, I will proofread what I just wrote above.